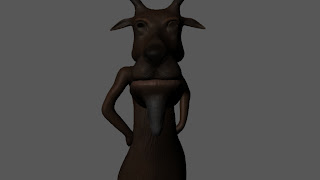
Sunday 5 December 2010

Development!


Socks! I want him to have some true scottish guard socks! Maybe not white as thats abit boring. So I will develop the colour more when I get texturing. 
Straps and Belts! I want Mcglone to have some belts on him now as well as a clip and a random strap. I don't plan to go crazy with modeling as I can maybe get away with texturing the patterns. I was looking into some nice celtic patterns that would suite but you most like wont see it all so no need to go crazy.


Here is the new design for the kilt! I wasn't to keen about the last so have gone into photoshop and changed things about.
Ok! I had my model and development nearly finished then I took another look at my Character and thought. NO!! I didn't like his clothes. I thought it needed more. So I didn't go crazy as I still want to give the idea that this character is made out of clay and his objects are tiny but made out of other materials. So Now I have start to research into changing his kilt colour, adding some socks and some straps! More highlander.

Renders Renders and Renders!

Now let the testing begin! 

Firstly wanted to comment on the texturing. I took the base colouring I did in zbrush and went into photoshop and using hair brushes I made and found on the internet I created a more detailed texture. I didn't go to crazy but I am alot happier than I was with the texture now.

Below are a selection of renders, the bottom one was the first out of the lot but will comment on each one and say what I liked or disliked about each one.

 Now this image makes me think. I like this render. I used a lambert for it and I know theres no reflection or specular but the texture comes out so much nicer than before! maybe I can try implement this when I do render passes?
 Blinntastic! Yeah this render was to much reflection and to much everything. Horrible effects going on there and the reflections are making the textures look strange.
 Another image with different lights. Wasn't to impressed or unhappy about this render. Needs work as the model doesn't standout well enough for me. The environment might not be there and the camera doesn't suit the lighting.
 Here is a ok render. No base this time, I was trying to get some specular and reflection, I thought underneath the chin was a nice result also near the elbow.

A front image of the one below. I am happy with the outcome, apart from textures. I might try add a IBR image to bring out some more interesting reflections and better lighting but that will be done when I am comfortable with the shader settings.
This was the first of the lot and is one of my favourite as I used blinn as well as lowering the reflection and specular down but I kept a hint of both there. Again I wasn't to keen on the texturing here and wanted to improve on that right away, But I am happy with the kilt textures they are fitting the job well and down plan to mess around with them to much.

Back into Maya!


Here are some quick renders showing the displacement maps and texture back in maya. At the moment I am not happy with them I feel that the texture is a low level to what I want and the displacements need abit more work to bring out the scratch clay surface. Also I am still learning about shaders so I am going to experiment with Blinn and Lambert, Blinn I feel will be the best as it will give off reflections and specular and I can adjusts these easily.

Basic base!


Here are some images of the base that I have sculpted in zbrush. I plan to texture these later next week properly as I want to get the character done to a high standard before I worry about the extra things. I am happy about how I have placed things and I wanted to give the impression of him stranding on a mound surrounded by poo but  haven't added this yet.

Thursday 2 December 2010

Cloth Detail


These images show the development of the cloth detail for Mcglone's texture. I feel I will tone them down a little bit more and try define the shape more. The textures are very simple. I was going to go into adding linen detail but I think I will use an blending mode in photoshop instead of trying to get a displacement map or bump working, I don't think it would make much difference.

Mcglones Textures coming together!


Here is a close up of the model as it stands. I have Modeled and Uv'ed all the cloth now. Going to finish the Sheath then going to start to bring the body texture back in and see if I can improve on the textures in photoshop. Up to here I am very confident in my skills but here is where I start to go into unfamiliar territory. I haven't done much really high detailed texturing and rendering, I have nearly finished the texturing and left my self 2 weeks to now start playing with rendering and lighting etc, this will also show me weak areas in the model!

Environment Base mesh!


Here a Selection of images showing the base mesh for the mound I want the character to be on for his turntable! I didn't want just a basic character spinning, I wanted a posed character and an environment that represents him in someway. Also you can see that I have textured his cloth now and given it some movement, this was done all in maya and Zbrush.

At this moment in time I am happy with the outcome. I still need to see all the textured files together before I can really start to edit the final look of the model.

Sunday 28 November 2010

Posed Mcglone Draft 1!


Here he is! in he naked form at the moment but that will change soon so please excuse the naked bum. But the brief did say he had to be bald, but it never said where. Hopefully you get what I mean by the bare bum now. I plan to have an iconic image of the Scottish old goat standing proud over his rock highlands with poo around his feet, then the kilt in the wind has blown up and shown that he is sticking to the old iconic of no underwear. I plan to draw some more poses but I wanted to get a little pose done So I got something to play with.

Zphere Rigging and Posing


These images show the little proxy rigg created using the zphere rigging method. I have done it before with a human body, that went really well but who knows what will happen with this mesh.

Well it was all good up to this point and I tried to bind and it warped the model beyond anything you have seen before and crashed. So I got really bored and switched over to transpose which is mask and move concept to put it simply.

Final touches in zbrush!.. for now


Here are some final images of zbrush work. I still plan to work into the colour a little bit more but that can be done in photoshop etc. I am really happy with the results. Maybe need to add some more ginger and grey but Will see what happens when all his clothes are on and he is striking a pose.

My day as a Compositor!

This blog is more writing that image based as I had the lucky chance to work along side the Framestore commercials departments compositors and was with them as they were finish of their latest project. I have been taking notes all day and in this post will try put through all I have learnt about rendering and compositing!

First thing I was told about was the workflow and file setup for Nuke. At Framestore they use open.exr files that contain all the renderpasses etc in one file which when opening for composited you can get it all in one and break it down rather than importing individual layers and passes then making sure they all fit together etc.

I got good information on render layers and what they are used for:

Diffuse- Can be used for all lights in the scene but also can be broken down into different lights such as a key light (key light which would be you main source of light that would give all the reflections and shadows) and a fill light ( you use to fill in the unshaded areas which some light which is a technique used in live shooting, this is so you don't have one side of the face lit and the other dark so fill light would just even up things) in nuke you would use a Add node to blend them together.

Specular - which is a generally used render pass.

Reflection and Refraction

Indirect- Which was the main thing I learnt during the day that was this indirect lighting so its general sun light that just illuminates everything, such as outside where it can be lit without any rays of light. You can do this by using IBR which I have played with alot today but not allowed to show the frames I played with but below is a quick one I made just for this post to show the difference in quality.

The image at the bottom shows all the render layers That I have been listing and how they can bring an image to light and give it so much more and the awesome reflection I am getting is the Hdr image in the IBR, ok I have tweeked it at all so the image isnt well balance but I wanted to show the difference when render is well thought out and how much of a difference it can make!

Ambient Occlusion!- also known as the dirty layer

Shadows!


Will be talking to them again during the week so will be posting again with more notes from rest of today and the next time!

Saturday 27 November 2010

Sporran planning & Referencing


These image show a fraction of the images I found on the legendary item of the scots the pouch they call the Sporran! These images show what I plan to model, they show the details and patterns I plan to put in, finally the tassels. Also I have an image of the tartan texture file I plan to use for the kilt. I don't want to use red as I feel the blue colour would suit the character more. But I will play with that next week when I plan to do the clothes texturing.

Details, Details and more details!

Above is an image showing detailing on the hoofs of the character. I'm really pleased with the out come! I like the detail I got only using the tools I chose to use to keep my clap style. I have cheated a little by adding colours but I'm really pleased with the result. Needs alittle touching up but that shouldn't take to long.


Above are 2 images showing more progress on the hoofs and legs. Again I think its going well and keeping the style I am wanting! It looks like clay but still gaining some sort of realistic surface not just plain block colours.


 Here shows before and after images of the hands. Still need to add details but so far so good. Again I am making sure realistic doesn't take over the clay style I am looking for.
 Above is the image of the textures horns. I added some realistic details showing age wear and tear such as scratches, dents and scuffs in the horns. I used a dark grey with some whites highlights to bring out the scratches. Also you can see I have added ginger highlights for the eyebrows to bring out that scotsmen stereotype.
 The image above shows progress on the head.


Above are 3 images showing the progress on the head. I have added alot more great to the model to show age etc. I am happy with the progress I have made and I feel I am getting alot of detailing with the tools I have chosen to keep the clay style going. I highlight the lips alittle bit more as well adding hairs in the ears, darkened the eyes which I plan to edited alittle as I want the eyes to show age the most.